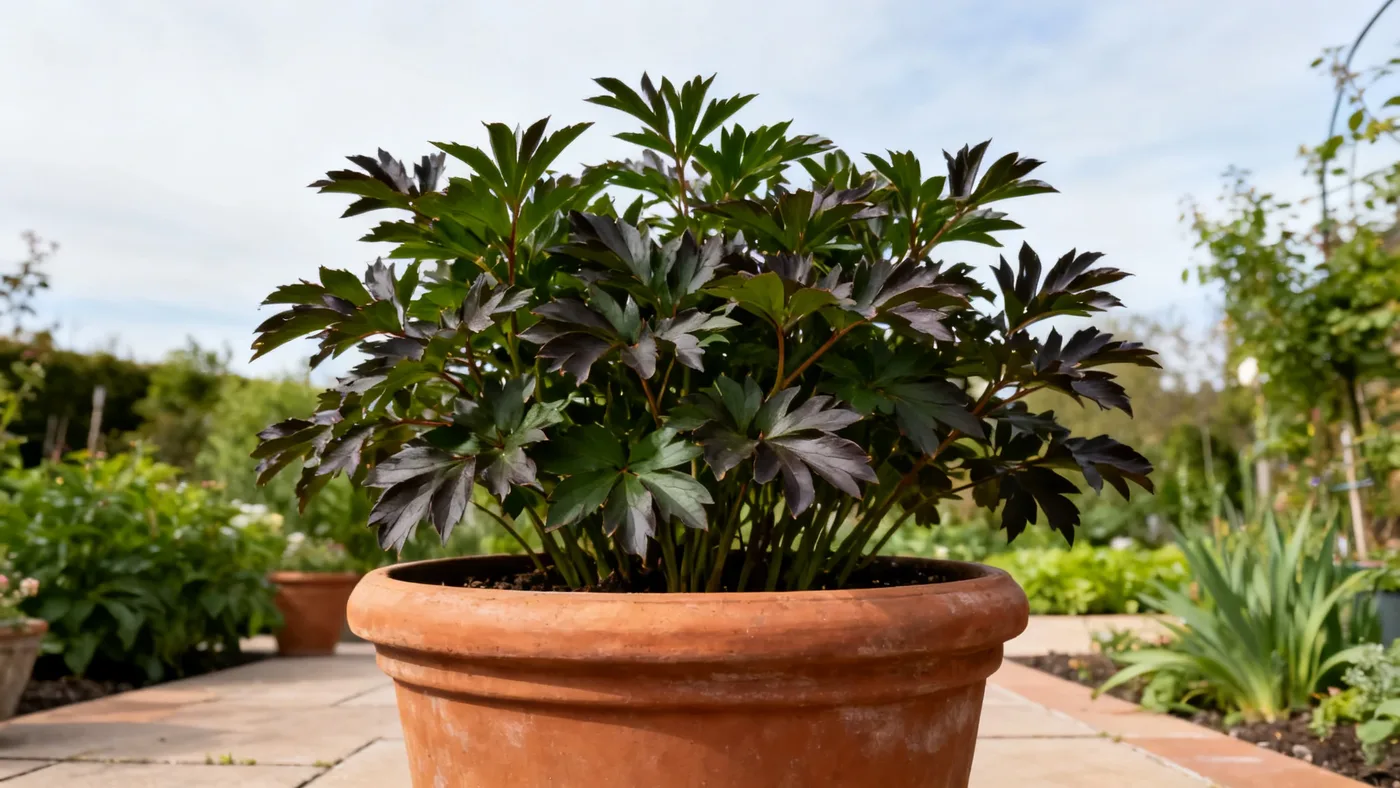
Growing Duchesse de Nemours Peony in Containers and Pots
Duchesse de Nemours Peony can grow in containers, though this is a less common practice than in-ground planting. If you have limited garden space, a small patio, or simply want to bring these fragrant blooms closer to your entryway, container cultivation is possible with the right approach. The key is using a large pot, proper soil, and understanding that containerized peonies will need more attentive watering and winter protection than their garden counterparts.
Can Peonies Grow in Containers?
Yes, Duchesse de Nemours Peony may perform reasonably well in containers, but there are honest caveats. Peonies are long-lived perennials that prefer consistent soil moisture and benefit from stable winter dormancy. In containers, the soil dries out faster, roots are more exposed to temperature swings, and pot-bound conditions can stress the plant over time. That said, many gardeners successfully grow peony container gardens, especially in zones 3 through 8, where winter freezing actually helps break dormancy.
Container-grown peonies typically perform and overwinter better in the ground, so if you have space in a garden bed, that is the preferable route. However, if you are working with patios, decks, or climate-controlled transitions, container cultivation can yield good results with proper care and realistic expectations about timeline and bloom volume.
Choosing the Right Pot Size and Material
Pot size is critical for success. Duchesse de Nemours Peony reaches a mature height of 26 to 36 inches and spreads 24 to 36 inches, so it needs substantial root space. The best pot size for peonies in containers is a minimum diameter of 18 to 24 inches, and you should aim for even larger if possible. A 20-inch or larger ceramic, terra cotta, or plastic pot works well. Avoid anything smaller, as the roots will quickly run out of room and the plant will struggle.
Material matters too. Terra cotta is beautiful and breathable but dries quickly and may crack in freezing climates. Ceramic pots with drainage holes offer durability and moisture retention. Plastic pots are lightweight and retain water, which can be an advantage or disadvantage depending on your local climate. Whatever you choose, ensure it has drainage holes to prevent waterlogging and root rot.
Soil Preparation
Peonies demand fertile, humus-rich, well-drained loam with a soil pH of 6.5 to 7.0. In containers, you cannot rely on generic potting soil alone; you must create a custom blend to support long-term growth. Mix the following:
- 2 parts high-quality potting mix
- 1 part compost or aged bark
- 1 part perlite or coarse sand for drainage
This combination provides the nutrition and drainage peonies need while keeping soil consistently moist without becoming waterlogged. Avoid heavy clay-based container soils, which compact over time and suffocate roots.
Materials You'll Need
- One container, 18 to 24 inches or larger in diameter, with drainage holes
- Potting soil mix (see recipe above)
- Bare-root Duchesse de Nemours Peony division or container-grown nursery plant
- Bone meal or bulb fertilizer (low-nitrogen, phosphorus-rich formula)
- Pruning shears
- Ruler or measuring tape
- Watering can or hose
- Tall plant stake or tomato cage for support (optional but recommended)
Step-by-Step Planting Instructions
Step 1: Prepare the Pot
Fill the container with your prepared soil mix to a depth of about 6 inches. Make sure the pot is sitting on a level surface with good drainage access underneath. If you are using a saucer, position the pot so water does not sit in it; drainage is non-negotiable.
Step 2: Position the Plant
If planting a bare-root division, gently spread the roots outward into the soil. If using a container-grown plant from a nursery, carefully remove it from its pot and loosen the root ball slightly. Place the plant so that the eyes (the small buds at the crown) sit no more than 1 to 2 inches below the soil surface. This depth is critical; planting too deep is the number-one reason peonies fail to bloom.
Step 3: Fill and Firm the Soil
Add your soil mix around the roots, gently pressing down to eliminate air pockets. Leave about 1 inch of space at the rim for watering. The top of the root crown should be just barely visible or just below the soil line. Check the eye depth one more time before moving forward.
Step 4: Add Fertilizer
Sprinkle a light application of bone meal or bulb fertilizer (low-nitrogen, phosphorus-rich) around the base, working it gently into the top inch of soil. Do not apply heavy nitrogen, which promotes foliage at the expense of blooms and can stress a young plant.
Step 5: Water Thoroughly
Water until the pot drains from the bottom. This settles the soil and helps roots make contact with the soil media. In the first season, water consistently to keep the soil evenly moist but not waterlogged. This is your foundation for success.
Daily Care and Maintenance
Duchesse de Nemours Peony needs full sun, meaning at least 6 hours daily. If you live in a hot southern climate, light afternoon shade is tolerated and may actually help preserve bloom color. Place the pot in a location where it receives morning sun and some afternoon protection if needed.
Water regularly during the growing season. For detailed watering strategies specific to containers, see our complete watering guide. Container plants dry out faster than in-ground specimens, so check soil moisture 2 to 3 times per week. The soil should feel consistently moist, like a wrung-out sponge. Once the plant is established (after 1 to 2 years), it becomes more drought-tolerant, but blooms perform best without prolonged dry spells.
In early spring as shoots emerge, apply another light feeding of bone meal or bulb fertilizer. Avoid heavy nitrogen fertilizers, which can lead to lush foliage with few flowers. Deadhead spent blooms throughout the season to redirect energy to root development.
Supporting Heavy Blooms
One practical advantage of container peonies is that they may be easier to support. When buds begin to develop, flopping stems under the weight of heavy double blooms is a common issue. Install a tall stake, peony ring, or small tomato cage early in the season, before blooms open. This prevents branch breakage and keeps flowers visible and off wet soil.
Overwintering Potted Peonies
Overwintering is where container cultivation differs most from in-ground planting and requires your attention. Peonies grown in the ground benefit from consistent soil temperature and insulation. In containers, the soil around roots freezes and thaws more readily, stressing the plant. In fall, after the first hard frost has killed back the foliage (typically late October to November in zones 3 to 8), cut the stems to the ground and remove all dead leaves.
Move the pot to an unheated location such as an unheated garage, cold frame, or sheltered porch where it will experience winter dormancy without wild temperature swings. The soil should stay slightly moist, not bone-dry. If you live in zones 3 to 5, wrap the pot in burlap or place it against a north-facing wall to insulate the roots from extreme temperature fluctuations. In zones 6 to 8, a sheltered location may be sufficient. The goal is to mimic the stable, cold conditions a peony experiences in the ground.
In early spring, as new growth begins to emerge from the soil (typically March to April depending on your zone), move the pot back into the light and resume regular watering. Do not fertilize until shoots are a few inches tall.
Common Mistakes to Avoid
Planting Too Deep: This is the number-one reason peonies fail to bloom. Eyes should sit no more than 1 to 2 inches below the soil surface. Check depth carefully at planting time and again before firming soil.
Poor Drainage: Using a pot without drainage holes or soil that is too heavy and compact will lead to root rot. Always use a pot with drainage and a mix that includes perlite or sand.
Pot Too Small: A container smaller than 18 inches in diameter will severely restrict root growth and limit blooming potential. The minimum is 18 to 24 inches diameter; larger is always better for long-term health.
Inconsistent Watering: Peonies dislike being waterlogged, but they also suffer if allowed to dry out for extended periods. Aim for consistent moisture, especially during the growing season and bloom time. Containers require more frequent watering than in-ground plants.
Insufficient Sun: Reduced blooming often occurs in too much shade. Ensure your pot sits in full sun (6+ hours daily) or light afternoon shade in hot southern climates only.
Fertilizer Overuse: Heavy nitrogen promotes leaves, not flowers. Use low-nitrogen, phosphorus-rich fertilizers sparingly, and only in early spring as shoots emerge.
Skipping Winter Protection: Overwintering is not optional; it is essential for survival and next-season blooming. Bring the pot to an unheated, protected location after frost kills back the foliage.
What to Expect in Your First Years
Do not expect a full floral display in year one. A newly planted bare-root division may produce a light bloom within 1 to 2 years after fall planting. Full, abundant blooms typically arrive by year 3 to 4 as the root system matures and the plant reaches its mature size of 26 to 36 inches tall and 24 to 36 inches wide.
In May or early to mid-season (depending on your USDA zone), you can anticipate creamy white double flowers with a pale yellow flushed center and a strong, sweet classic peony fragrance. The timeline for bloom varies slightly by zone and regional climate, but the phenology remains consistent within zones 3 through 8. For more on all aspects of growing this cultivar, see our complete Duchesse de Nemours care guide.
Once established, a potted peony may live for many years, though lifespan is generally shorter and performance less robust than an in-ground specimen. With consistent care and proper winter protection, some gardeners have maintained containerized peonies for decades.
Quick Reference: Container Peony Care Checklist
| Task | When | Key Details |
|---|---|---|
| Select pot | Before planting | Min. 18-24 in. diameter; must have drainage holes |
| Plant bare-root division | Fall (preferred) | Eyes 1-2 in. below soil surface; spread roots evenly |
| Water | Growing season (spring-summer) | Check soil 2-3 times per week; keep evenly moist |
| Apply fertilizer | Early spring as shoots emerge | Bone meal or bulb fertilizer (low-nitrogen); light only |
| Provide sun | All season | Full sun (6+ hours daily); light afternoon shade in hot climates OK |
| Install support | Late spring before flowers open | Stake, peony ring, or tomato cage to prevent flopping |
| Deadhead blooms | During and after bloom | Remove spent flowers to redirect energy to roots |
| Cut foliage back | Late fall, after hard frost | Cut to ground level; remove all dead leaves |
| Overwinter pot | Nov. through March (zones 3-8) | Move to unheated location; keep soil slightly moist; wrap in zones 3-5 |
| First light bloom | 1-2 years after planting | Expect modest flowering; full display by year 3-4 |
| Mature size | By year 3-4 | 26-36 in. tall; 24-36 in. wide |